This tutorial provides a practical guide for WordPress local development using docker compose. You will learn how to deploy WordPress on localhost using docker compose.The installation process described here can be used to easily run WordPress in docker on the different operating systems: Windows, MAC and Ubuntu.The installation tool kit include:
- WordPress files
- MariaDB/MySQL used for WordPress database
- phpMyAdmin interface to connect to your MySQL database
- WP-Cli: WordPress Command Line Interface
- Makefile directives for automatization.
You can automatically deploy a local docker wordpress site in 5 minutes using the following commands. Two options are available: make command and docker-compose standard commands.
# Download a wordpress docker-compose example
git clone https://github.com/kassambara/wordpress-docker-compose
cd wordpress-docker-compose

# Use make command for automatic installation and
# configuration of wordpress
make autoinstall

# Or, use docker-compose standard commands
docker-compose up -d --build
docker-compose -f docker-compose.yml -f wp-auto-config.yml run --rm wp-auto-config- Visit your wordpress website at http://localhost. Default identification for admin (http://localhost/wp-login.php):
Username: wordpressandPassword: wordpress
- Visit your database via phpMyAdmin at http://localhost:8080
Username: rootandPassword: password
Contents:
- Quick start
- Step 1. Download a WordPress docker-compose template
- Step 2. Inspect the content of configuration files (optional)
- Step 3. Edit the WordPress Docker setup environment variables
- Step 4. Install WordPress using docker compose
- Step 5. Access to your website
- Shutdown and cleanup
- Debugging tips on Windows
- Summary
- References
Quick start
- Download an example wordpress docker-compose template:
git clone https://github.com/kassambara/wordpress-docker-compose
cd wordpress-docker-compose- Start docker-compose wordpress installation
You can use either the docker-compose standard commands or the make command.
- Using the
makeshortcut commands (easy for Unix systems (MAC, Linux)):
make install- Using the
docker-composestandard commands:
# Buid images, then start
docker-compose up -d --build
# Check availability of services: MySQL, Nginx/Wordpress
docker-compose run --rm healthcheck- Configure wordpress manually
- Visit your site at http://localhost to start configuring your wordpress installation.
- Visit the phpMyAdmin interface to your database at http://localhost:8080. Default identification:
Username: rootandPassword: password
Note that, it’s also possible to install and configure WordPress automatically using the WordPress command line interface (WP cli) in the back-end.
Automatic docker wordpress installation and configuration:
- Using the
makeshortcut commands (easy for Unix systems (MAC, Linux)):
make autoinstall- Using
docker-composestandard commands:
# Build docker images and start up wordpress
docker-compose up -d --build
# Automatic wordpress configuration
docker-compose -f docker-compose.yml -f wp-auto-config.yml run --rm wp-auto-config- Visit your site at http://localhost
Useful set of commands to know:
- Using the
makeshortcut commands (easy for Unix systems (MAC, Linux)):
# Stop and remove wordpress docker containers
make down
# Build, and start the wordpress website
make start
# Reset everything
make reset- Using
docker-composestandard commands:
# Stop and remove containers
docker-compose down
# Build, and start the wordpress website
docker-compose up -d --build
# Reset everything
docker-compose down
rm -rf mysql/* wordpress/*
The following sections show a detailed step by step guide.
Step 1. Download a WordPress docker-compose template
Download a template from Github at: kassambara/wordpress-docker-compose
git clone https://github.com/kassambara/wordpress-docker-compose
cd wordpress-docker-compose
Template directory tree:
files/wordpress-docker-compose
├── LICENSE
├── Makefile
├── README.Rmd
├── README.md
├── config
│   └── php.conf.ini
├── docker-compose-onlinehost.yml
├── docker-compose.yml
├── mysql
├── wordpress
├── wp-auto-config.yml
└── wpcli
    ├── Dockerfile
    ├── Makefile
    └── entrypoint.sh
Essential folders:
- mysql: MySQL database files for MariaDB
- wordpress: WordPress web files
- wpcli contains a Dockerfile example to build WordPress CLI.
Essential files:
- .env file: contain the environment variables required for the wordpress installation
- docker-compose.yml: WordPress docker compose application services
- Makefile: Set of simple bash command lines to build, install and configure WordPress, as well as, to start and stop the docker containers.
Step 2. Inspect the content of configuration files (optional)
Click here to inspect the content of the configuration files
Step 3. Edit the WordPress Docker setup environment variables
A .env file has been included to easily set docker-compose variables without having to modify the docker-compose.yml configuration file itself.
Default values have been provided as a means of getting up and running quickly for testing purposes. It is up to the user to modify these to best suit their deployment preferences.
Open the .env file and update the contents if you want. For example, just change the project name and your password (for database and wordpress admin).
# Open the file
nano .envContents:
# 1/ Project name -------------------------------------------------
# Must be lower-case, no spaces and no invalid path chars.
# Will be used also as the WP database name
COMPOSE_PROJECT_NAME=wordpress

# 2/ Database user and password -----------------------------------------
# Set non-root database user if wanted (optional)
DATABASE_PASSWORD=password
DATABASE_USER=root

# 3/ For wordpress auto-install and auto-configuration -------------------
WORDPRESS_WEBSITE_TITLE="My Blog"

# URL: Use this for localhost
WORDPRESS_WEBSITE_URL="http://localhost"
WORDPRESS_WEBSITE_URL_WITHOUT_HTTP=localhost
# Or this for online hosting (remove the # comment prefix)
# WORDPRESS_WEBSITE_URL="http://www.example.com"
# WORDPRESS_WEBSITE_URL_WITHOUT_HTTP="www.example.com"
WORDPRESS_WEBSITE_POST_URL_STRUCTURE="/blog/%postname%/"

# Website admin identification. Specify a strong password
WORDPRESS_ADMIN_USER="wordpress"
WORDPRESS_ADMIN_PASSWORD="wordpress"
WORDPRESS_ADMIN_EMAIL="your-email@example.com"

# 4/ Software versions -----------------------------------------------
WORDPRESS_VERSION=latest
MARIADB_VERSION=latest

# 5/ Ports: Can be changed -------------------------------------------
PHPMYADMIN_PORT=8080

# 6/ Volumes on host --------------------------------------------------
WORDPRESS_DATA_DIR=./wordpress

# 7/ Healthcheck availability of host services (mysql and woordpress server)
# Waiting time in second
WAIT_BEFORE_HOSTS=5
WAIT_AFTER_HOSTS=5
WAIT_HOSTS_TIMEOUT=300
WAIT_SLEEP_INTERVAL=60
WAIT_HOST_CONNECT_TIMEOUT=5

# 8/ Used only in online deployement ---------------------------------
WORDPRESS_WEBSITE_URL_WITHOUT_WWW=example.com
PHPMYADMIN_WEBSITE_URL_WITHOUT_HTTP=sql.example.com
Step 4. Install WordPress using docker compose
Two methods are available for installing and configuring your WordPress web site:
- Automatic installation + manual configuration
- Automatic installation + automatic configuration
Method 1. Automatic installation + manual configuration
Automatic installation of WordPress in docker
Three lines of docker-compose commands:
- Build docker application images
- Start wordpress installation in detached mode
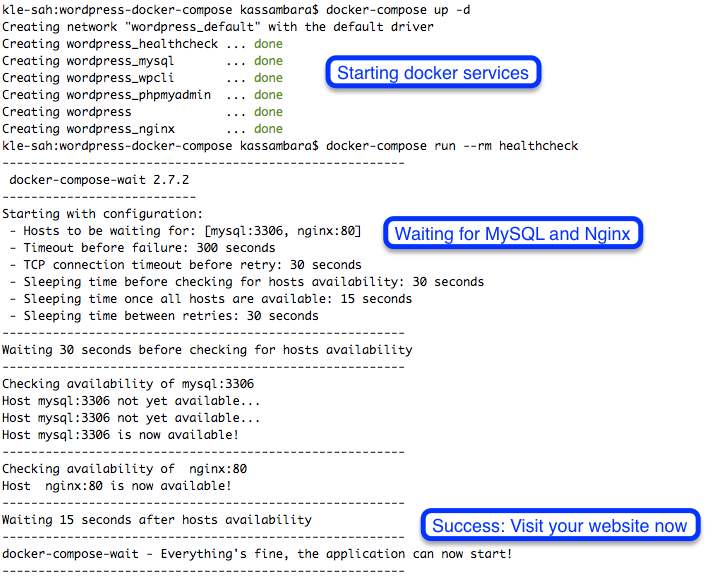
- (Health)Check the availability of WordPress docker services
docker-compose build
docker-compose up -d
docker-compose run --rm healthcheck
Explaining the different docker compose options:
-d: start containers in detached options--rm: remove containers when stopped
Alternatively, you can also use the following make shortcut commands. Easy to use on Unix operating systems (MAC and Linux)
make installConsole logs look like this:
Manual WordPress configuration
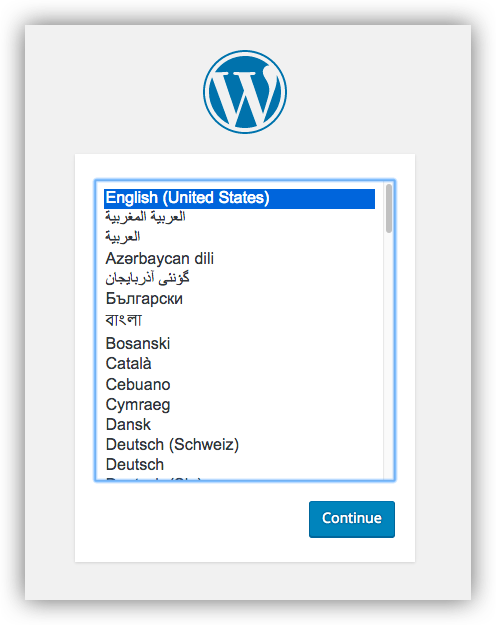
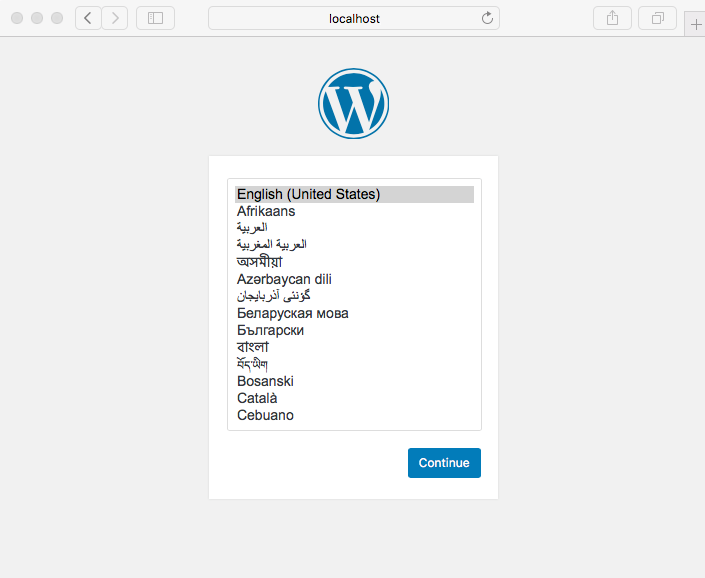
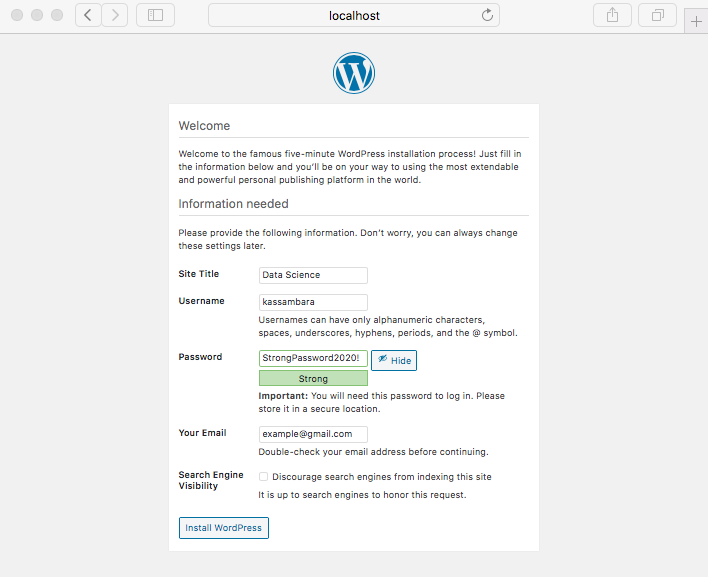
Navigate your browser to http://127.0.0.1 or http://localhost and follow the installation prompts
- Set WordPress language
- Create an administrative user
- Success
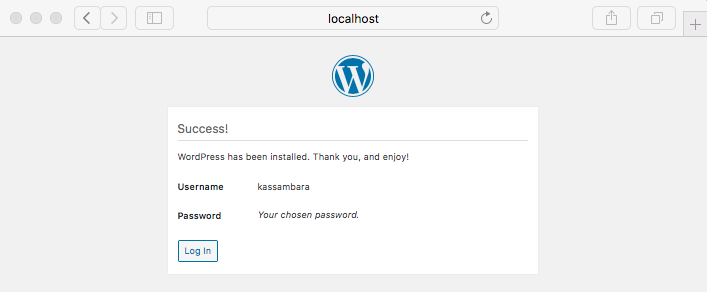
- Log in as the administrative user
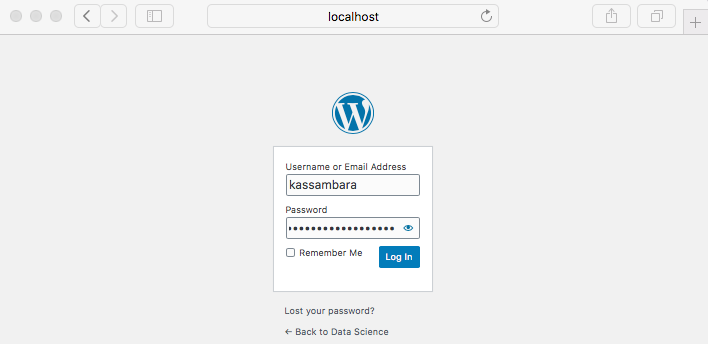
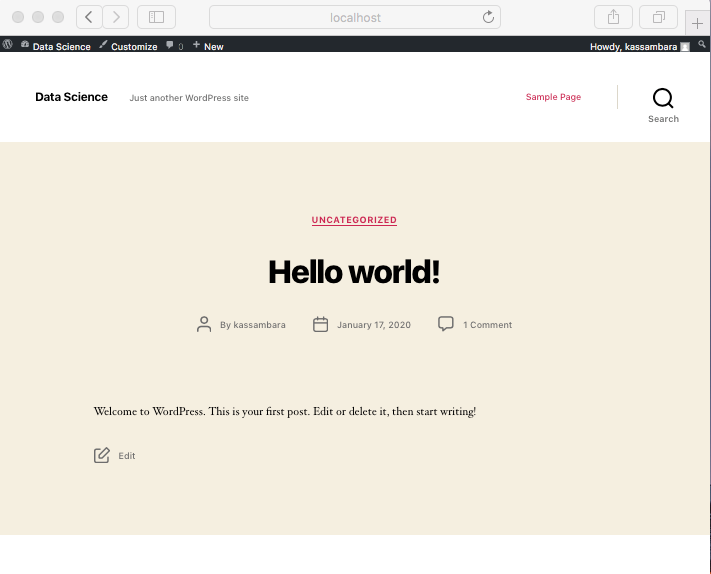
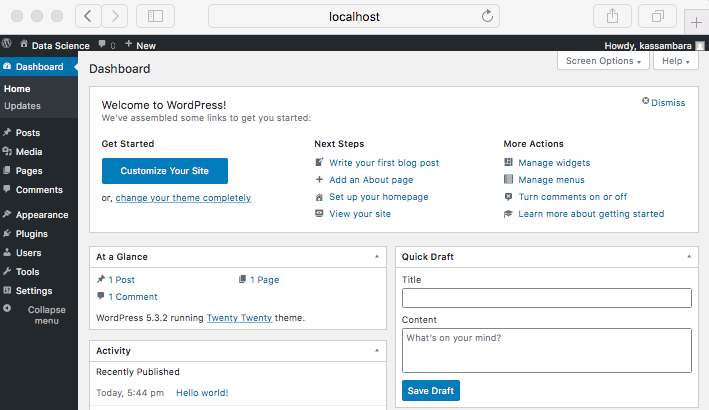
- Admin dashboard
Method 2. Automatic installation and configuration
Before, re-trying the installation, first clean up everything as follow:
docker-compose down
rm -rf mysql/* wordpress/*
The following docker-compose or make commands can be used to automatically install and configure wordpress.
Using the docker-compose commands.
# Build docker images and start up wordpress
docker-compose up -d --build
# Automatic wordpress configuration
docker-compose -f docker-compose.yml -f wp-auto-config.yml run --rm wp-auto-config
Using the make commands. For Unix systems (MAC and Linux) users:
make autoinstallStep 5. Access to your website
- Visit your wordpress website at http://localhost. Default identification for admin (http://localhost/wp-login.php):
Username: wordpressandPassword: wordpress

Once your site is running you can begin to create and publish any content you’d like in your WordPress instance.
- Visit your database via phpMyAdmin at http://localhost:8080
Username: rootandPassword: password

Shutdown and cleanup
This section present useful set of commands to know.
- Shutdown WordPress docker containers and dependencies. The command
docker-compose downremoves the containers and default network, but preserves your WordPress database.
# Stop and remove containers
docker-compose down- (Re)start WordPress docker compose containers
docker-compose up -d- Reset or reinitialize everything
- Stop and remove containers
- Remove related wordpress and mysql installed files
docker-compose down
rm -rf mysql/* wordpress/*
Note that, instead of using the above docker-compose commands, you can also use easily the following make shortcut command lines if you have Unix systems (MAC / Linux).
# Build, and start the wordpress website
make start
# Stop and remove wordpress docker containers
make down
# Reset everything
make reset
Debugging tips on Windows
If you encounter an error on the mysql container like this:
[ERROR] Plugin ‘InnoDB’ registration as a STORAGE ENGINE failed.
[ERROR] Unknown/unsupported storage engine: InnoDB
please add the following to the mysql stanza:
command: --innodb-flush-method=fsync --innodb-use-native-aio=0
This is partly because Windows (or to be precise NTFS) doesn’t support Asynchronous I/Os (see this for more details).
Summary
This tutorial provides a practical guide for WordPress local development using docker compose.
Recommended for you
This section contains best data science and self-development resources to help you on your path.
Books - Data Science
Our Books
- Practical Guide to Cluster Analysis in R by A. Kassambara (Datanovia)
- Practical Guide To Principal Component Methods in R by A. Kassambara (Datanovia)
- Machine Learning Essentials: Practical Guide in R by A. Kassambara (Datanovia)
- R Graphics Essentials for Great Data Visualization by A. Kassambara (Datanovia)
- GGPlot2 Essentials for Great Data Visualization in R by A. Kassambara (Datanovia)
- Network Analysis and Visualization in R by A. Kassambara (Datanovia)
- Practical Statistics in R for Comparing Groups: Numerical Variables by A. Kassambara (Datanovia)
- Inter-Rater Reliability Essentials: Practical Guide in R by A. Kassambara (Datanovia)
Others
- R for Data Science: Import, Tidy, Transform, Visualize, and Model Data by Hadley Wickham & Garrett Grolemund
- Hands-On Machine Learning with Scikit-Learn, Keras, and TensorFlow: Concepts, Tools, and Techniques to Build Intelligent Systems by Aurelien Géron
- Practical Statistics for Data Scientists: 50 Essential Concepts by Peter Bruce & Andrew Bruce
- Hands-On Programming with R: Write Your Own Functions And Simulations by Garrett Grolemund & Hadley Wickham
- An Introduction to Statistical Learning: with Applications in R by Gareth James et al.
- Deep Learning with R by François Chollet & J.J. Allaire
- Deep Learning with Python by François Chollet
Version:
 Français

This is awesome. Really.
One thing is anoying, the volume in ./wordpress is not writable from the host, making thing hard with an IDE.
The install process should handle that.
Thank you for your positive feedback! I’ll check this issue. Which operating system are you using?
How do install a theme directory – I’d prefer to keep it separate from wordpress and have docker just match up the directories. That will also enable me to use git with my theme but not with wordpress stuff
I have used these command on my f1-micro instance on google cloud (ubuntu 16.04 LTS minimal OS). everything worked well but when I tried accessing the instance using its external IP address, I’m getting an error saying “unable to connect”.
I want to create a personal wordpress website and blog for my Data science journey. I’m trying to host my wordpress on google cloud free f1- micro instance.
Could you please help me out?
Much thanks for this great tutorial! Everything works nicely but I wonder if it would be possible to setup auto-login so that when you go to the browser, you don’t have to enter credentials. Any thoughts?